Outdoor Installation of a Plinth
How to install an enclosure and a plinth together?
An outdoor installation of a plinth is quite simple.
First of all, we will see how to install or assemble an enclosure with a plinth. Read below the different steps and check out our video.
- Place the enclosures on the top of the plinth.
- Open the enclosure door and place the M10x 90 bolts (not provided) in the predrilled holes in each corner of the enclosure and plinth.
- Open the front panel of the plinth and using the nuts and washers tighten each of the four bolts in place.
- Insert the front panel back in place and lock.
- Close the enclosure and lock.
Outdoor installation of a plinth – How to install a plinth to the ground?
1. Dimensions to keep in mind:
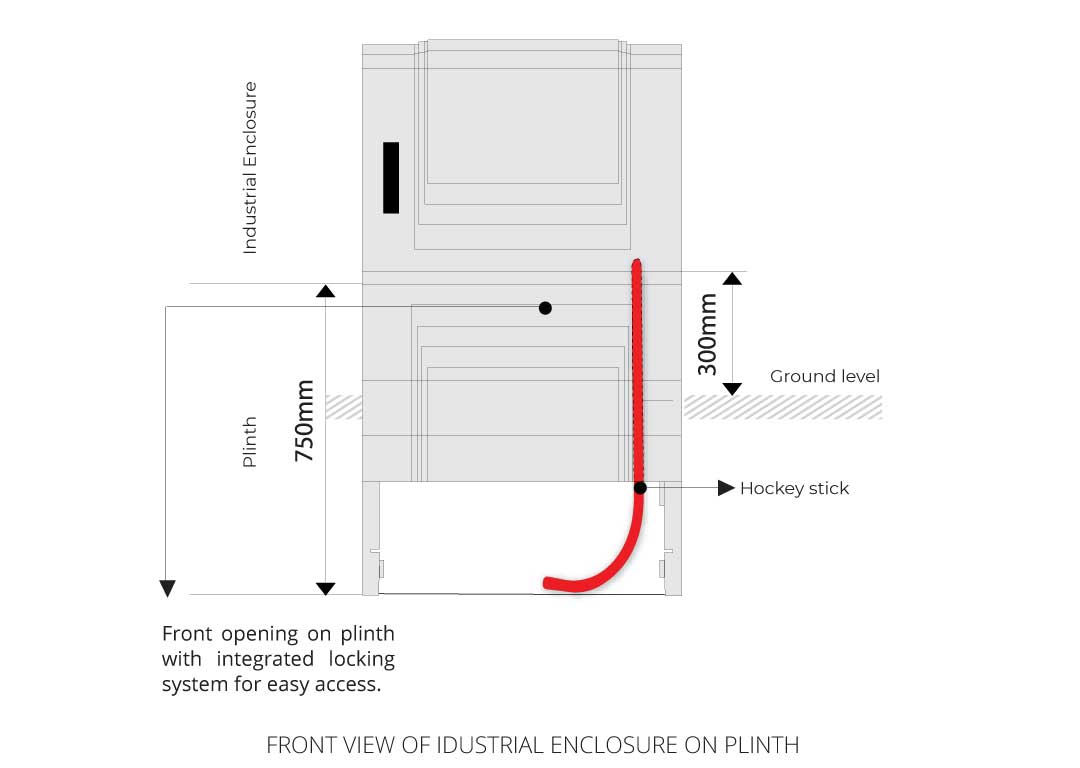
The overall height of the plinth is 750mm.
The height above the ground level is 300mm and the height below ground level is 450mm. See the drawing below.

2. Preparations – before installing the plinth in the ground
- Drill the top of the plinth for hockey sticks (outer diameter: 42mm) or ducting to provide an entry location for the enclosure/cabinet base.
- Drill the base of the enclosure at the same location to provide inlet location for pipework/hockey stick containing cables.
- Cut the hockey stick to raise the cables to 800mm from the bottom of the plinth or as per requirements. Make sure that the holes on the plinth top and on the enclosure base are matching/drilled at the same location to provide access to pipework through the enclosure top to its interior.
- Allow a projection of 25mm of the hockey stick or duct into the base of the cabinet.
Ground Installation Instructions for Outdoor Installation of a Plinth
See below the step by step guide to installing a plinth to the ground.
Wet and Dry Sites
Is your site wet or dry? Follow our simple step by step guidance.
- A dry site is one where the water table never rises higher than the base of the plinth.
- A wet site is one where the water table may rise higher than the base of the plinth.
| Tricel plinth installation | Dry site | Wet site |
|---|---|---|
| Make sure the excavation exceeds the dimensions of the enclosure by 1m, to maintain space of 500mm all around. | ||
| For a plinth having a base dimension 500x300mm, the excavation size required is 1500x1300mm. For a plinth having base size 750x300mm, the excavation size required is 1750x1300mm. | ||
| Remove all soft spots or large stones and boulders from the excavation. | ||
| Determine the site conditions (WET or DRY) by examining the excavation. | ||
| A base is then formed using compact gravel and this must be flat and level. | X |
|
| A base is constructed of a 50mm layer of compact gravel covered in a 250mm layer of 25n Semi-Dry Concrete. The semi-dry concrete base should extend 150mm all around the plinth. | X | |
| Position the plinth correctly, ensuring that the top of the plinth / the base of the enclosure is approximately 300mm above ground level. * This dimension is important in order to maintain access through the plinth. | ||
| Ensure that the plinth is 100% level. | ||
| Using hex-head washer-slotted 6 x 60mm concrete screws, fix the legs of the plinth to the concrete base. Note, the plinth comes supplied with a base plate that has four pre-drilled corner holes. The plate can be used as a template to locate the drill locations on concrete. | X | |
| Fit the ducts and hockey sticks as required. Complete the laying of the ducting/hockey sticks that contain the power supply to the Enclosure. Ensure the ducting containing the hoses and the power supply cable rises vertically up above the finished ground level inside the enclosure. | ||
| The plinth front can be locked. Open the lock and remove the front of the plinth for easy access. Inside the plinth, continue filling with gravel until the gravel layer reaches within 50mm of the finished ground level. | ||
| A layer of concrete can be applied inside the plinth around the ducting/hockey sticks until the internal level reaches finished ground level. | ||
| Using the nut and bolts (M10 x 90mm, not supplied), mount the base(s) of the enclosure with the plinth’s top at four locations. Make sure the holes at the top of the plinth with hockey sticks match the holes at the base of the enclosure. The hockey sticks or any pipework/connections going inside the enclosure must be filled with expanding foam to prevent corrosive gases from entering the enclosure. | ||
| Outside the plinth, continue to backfill with gravel until the gravel layer is level with finished ground level. |
Gravel specifications
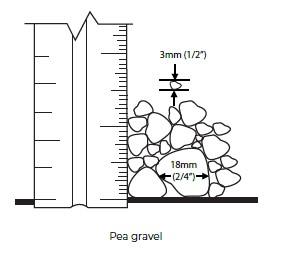
ROUNDED PEA GRAVEL:
• Minimum particle size 3mm, maximum 18 mm, compacted to a relative density of >70%.
• Gravel shall be clean and free-flowing, free from large rocks, dirt, sand, roots, organic materials or debris.
• Upon screening analysis, the backfill material shall have no more than 5% by weight passing 2.36 mm sieve.

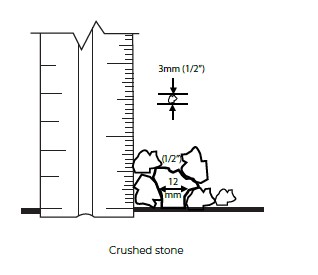
CRUSHED OR PROCESSED STONE:
• Minimum particle size 3 mm, maximum 12 mm, compacted to a relative density of >40%
• Dry gravel density must be at least 1500 kg/m3. The material should be washed or screened to remove fine particles.
• Upon screening analysis, the backfill material shall have no more than 5% by weight passing 2.36 mm sieve.

Don’t hesitate to contact us if you have any questions regarding the Outdoor Installation of a Plinth or Pedestal.

40 Years In Construction

Expert
Advice

Fast
Delivery

Online
Support

